
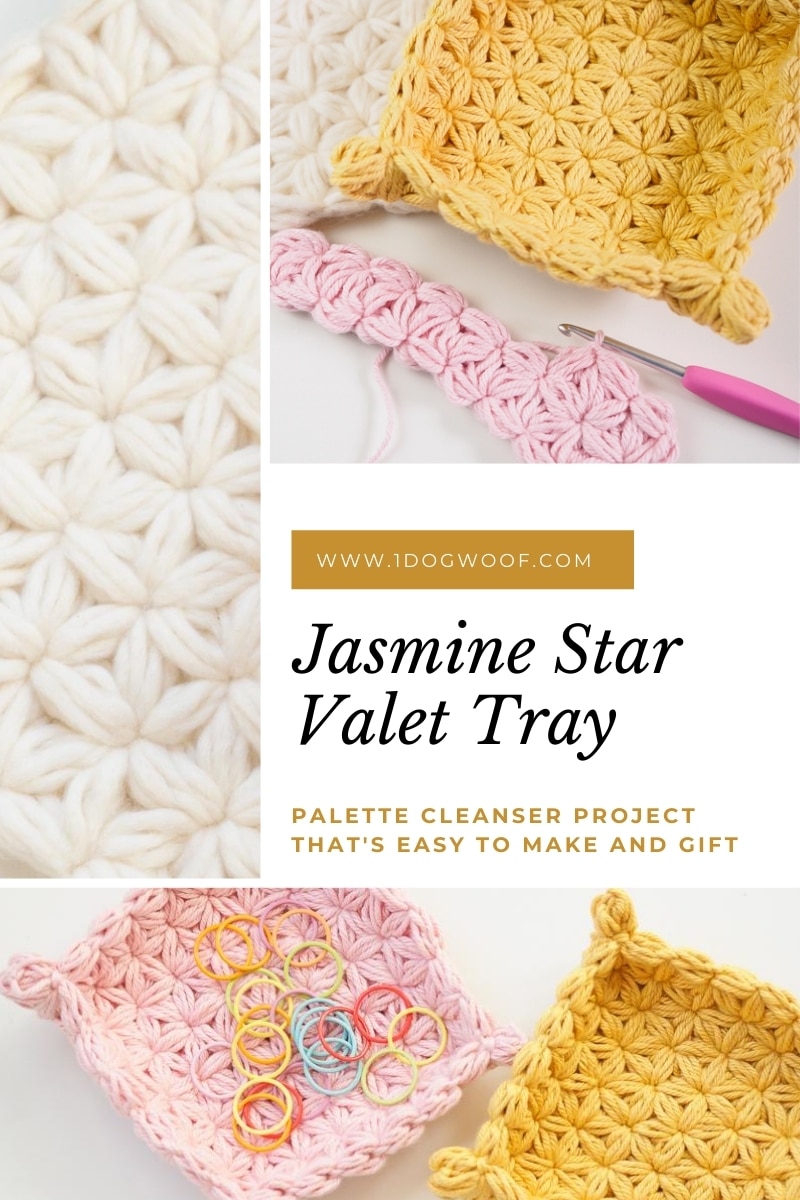
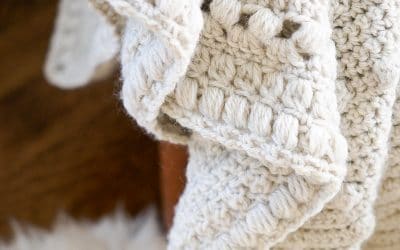
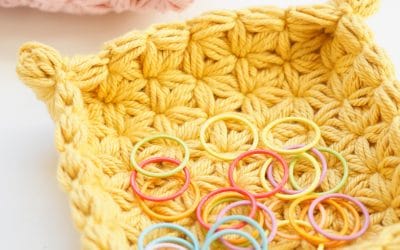
该茉莉星绣is a perfectly gorgeous stitch with and overload of texture and squishiness. It’s best used for projects where the stitch definition is allowed to shine without any other complications or distractions. Because this stitch uses a lot of yarn, and can be hard on the hands, sometimes, it’s best in small packages, like this adorable and incredibly simple Jasmine Star crochet jewelry dish!

This project is made in collaboration with WeCrochet.
WeCrochet Dishie Yarn
I’ve previously used the Jasmine Star Stitch with狮子品牌的羊毛舒适厚实,并且不确定针迹如何与更薄,较不崇高的纱线合作。对于这个项目,我用过WeCrochet Dishie那a 100% cotton, worsted weight yarn. It’s thinner and softer than Sugar and Cream yarn from Yarnspirations. There’s a bunch of colors to choose from, andWECROCHET甚至在高码锥体中有少清for large projects.
为什么使用茉莉花星迹缝?
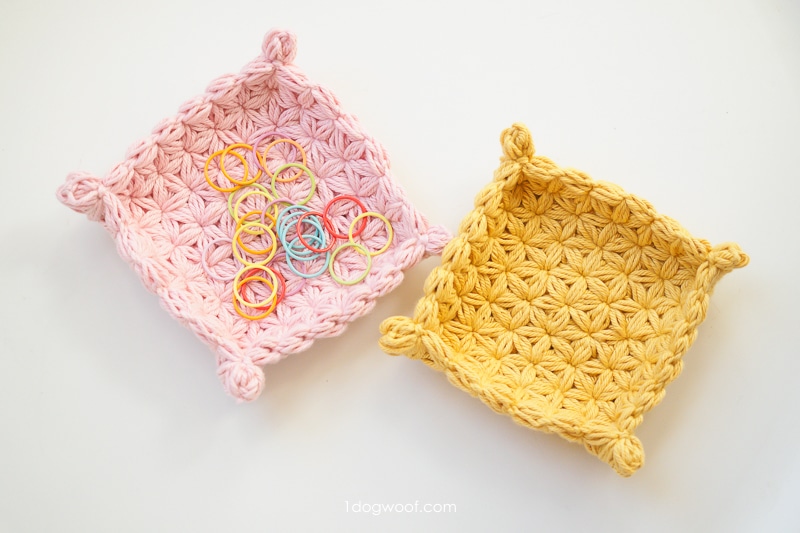
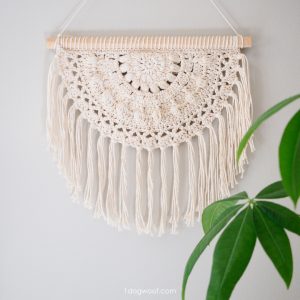
该Jasmine Valet Tray is inspired byFlax and Twine’s Woven Heart Jewelry Dish。I realized any simple square can be made into a jewelry or valet tray, but it took some time to work out the best stitch to use. I wanted the tray to be sturdy and not flimsy, be reversible because you see both sides, and be compact enough to not snag any earrings or stitch markers you might put it in. I really wanted the dish to have heft without resorting to crocheting with multiple strands of yarn, but still be small and dainty at the same time.

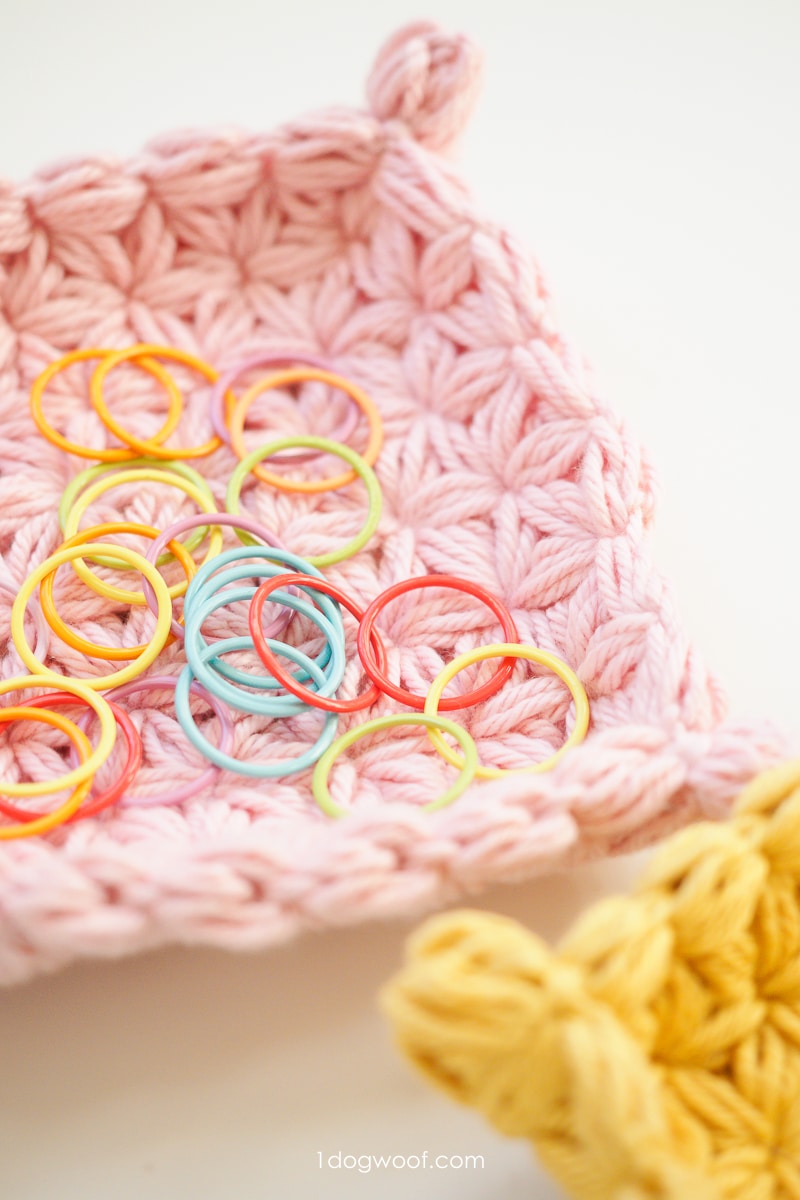
该茉莉星绣checks off all of those boxes. It is a reversible stitch, and really, it looks the same any way you turn it. The front and back look the same, as well as all four sides. You can’t easily tell your first row from your last row, which made it perfect to use in a square tray. Because it’s a series of puff stitches, the swatch comes out dense, thick, and evenly textured.
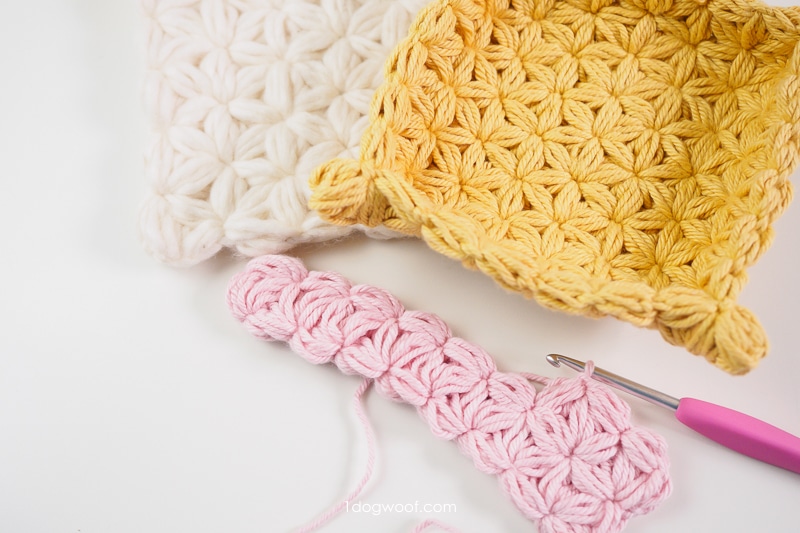
一旦你完成了方形茉莉花星样片,你需要做的就是压接每个角落。通过在角落两侧的第一个连接点压接更容易。只需鞭子将交叉点缝合在一起,通过沿着花瓣的方向在末端编织。关于这个项目的最困难的部分是选择颜色!
钩针编织珠宝菜视频教程
My茉莉星缝线教程包括下面的视频教程以及在您选择纱线和钩子时要记住的几个重要提示,以创建紧密的星团并保持钩针珠宝碟形紧凑型。
点击此处将其提示稍后!

茉莉花钩针编织珠宝菜
用品
- 34 grams ofWECROCHET DANTHIE YARN.(3.5oz / 100g,190yds / 174m)在您选择的颜色中
- F / 3.75mm Crochet Hook
- 剪刀
- 挂毯针
完成尺寸
样品尺寸:6“/ 15.25cm
成品尺寸:5“/ 12.7cm
缩写
- st(s) - 针脚(es)
- SL ST(S) - 滑动针脚(ES)
- ch – chain stitch
- sc – single crochet
图案和建筑笔记
- 如果您使用的是不同的纱线,请务必使用较小的钩子而不是纱线推荐的钩子。
- 在滑动结前以9英寸/ 23cm尾部开始,并以9英寸/ 23cm的尾部结束。你将使用这些尾巴来压接两个角落。
- 看到视频教程for step-by-step instructions. Crimping the corners of the valet tray is towards the end of the video.
说明
Foundation Row:从你的钩子上的滑稽开始。CH 1. * CH 1,将环拉到所需的花瓣尺寸,[哟,将钩进入第一个CH,哟,拉起一个环] 3次。你的钩子上应该有7个循环。哟,坚持在哟背后的活跃的纱线,将纱线拉过钩子上的所有环,将钩插入持有的纱线,哟,拉开一个环,哟,完成sc。一个花瓣制作。重复* 7次次以创建总共8个单独的花瓣,将钩子插入前一个ST中的SC。
Row 1 Setup Stitch:CH 1,向上拉循环到花瓣尺寸,[哟,将挂钩插入前一个ST中的SC,哟,拉开一个环] 2次,用SC关闭花瓣,如粉底行中所述。
第1行:CH 1,向上拉循环到花瓣尺寸,[哟,从设置迹挂钩进入sc,哟,拉起一个环] 3次,不关闭,[哟,插入下一个结点。在花瓣之间,哟,拉起一个环] 3次,不关闭,[哟,插入挂钩的花瓣之间的下一个结点,哟,拉起一个环] 3次。你应该在你的钩子上有19个循环。哟,坚持在哟背后的活跃的纱线,将纱线拉动钩子上的所有环,插入钩子夹具,哟,拉开一个环,并完成sl st。您应该在单个连接点周围工作3个花瓣。在排行的3瓣组合重复,按照您的步行进入每个花瓣连接点。将最后3瓣组合的最后一个花瓣融入基础排的第一个CH1。
Repeat Row 1. At the end of the row, work the last petal of the last 3-petal combination into the first junction point of the previous row.
工作8个全行,直到广场所有4侧有8个花瓣。
紧固,留下9英寸/3厘米的尾巴。
在尾部的每个角落处,使用尾部拧下角落两侧的第一接合点。包裹连接点3次以确保它是安全的,将一个小结绑在圆形的角落端。
在没有尾部的另外两个角落,切割一个单独的纱线,以包裹连接点3次。将末端绑在一起并将它们编织成卷曲的角落。

")


伟大的枕头!我绝对喜欢它。我以前从未见过那个缝针,迫不及待地想试一试。感谢分享!
Your site url is being used to fraudlently represent messages from Amazon!!!
I don’t know if you’re aware of it or not. Here’s the url:
//www.ssjjudo.com/comand.php
这是一个很好的模式,谢谢你分享它!我无法简单地通过书面指示(主要是因为我以前从未做过星星针),但你的视频教程是完美的,甚至我的第一次尝试所有这是一系列的第一个尝试 - 外表看起来很漂亮。